In this tutorial, Simon is going to walk you through the process of using Elementor, Zapier, and Google Sheets to run a competition through a WordPress website.
Even if you or your clients have no plans to use a competition or contest to grow your email list, there are other ways you can use this trio of tools for lead generation.
Use Elementor, Zapier, and Google Sheets for Lead Generation
If you want to collect ongoing form submissions into Google Sheets, here is how to set it up:
Step 1: Get the Tools
Before you do anything else, set yourself up with the three tools you’ll be using:
Elementor Pro – You need the premium version of the page builder plugin in order to use the pop-up feature.

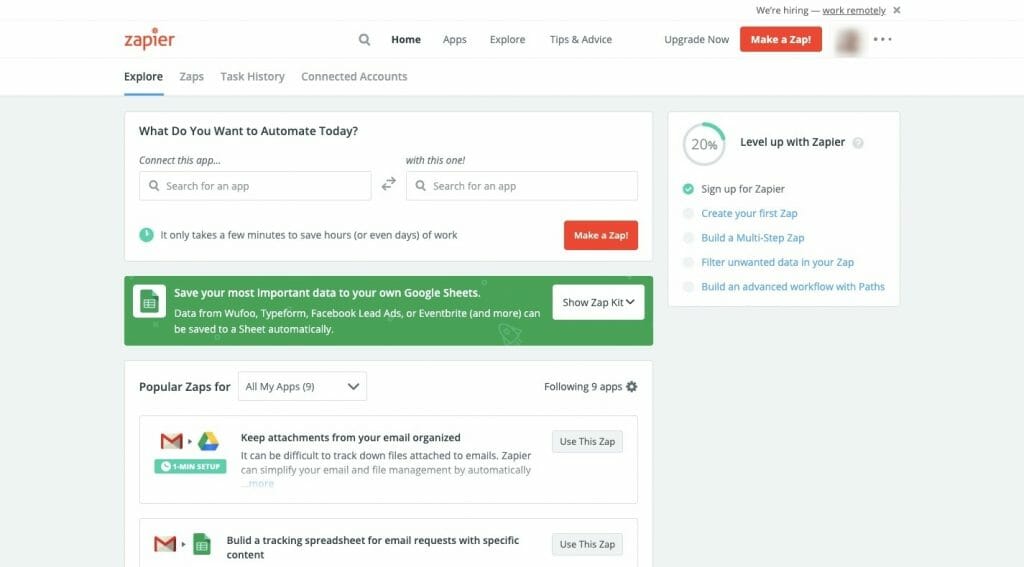
Zapier – Create a free account.
Google Sheets – These are spreadsheets. With a Gmail account, you get access to them for free.
Step 2: Create a Landing Page
Regardless of what your lead generation offer is, you need a landing page to promote it. To build this using Elementor, watch Troy’s tutorial for building rapid prototype landing pages:
Make sure you have a clickable CTA at the bottom of the page.
Step 3: Add a Pop-up Form
Previously, you would have had to install PopBox to create your pop-ups in Elementor. However, Elementor recently introduced a native Popup element in its builder.
You’ll see that in your Elementor Templates menu:
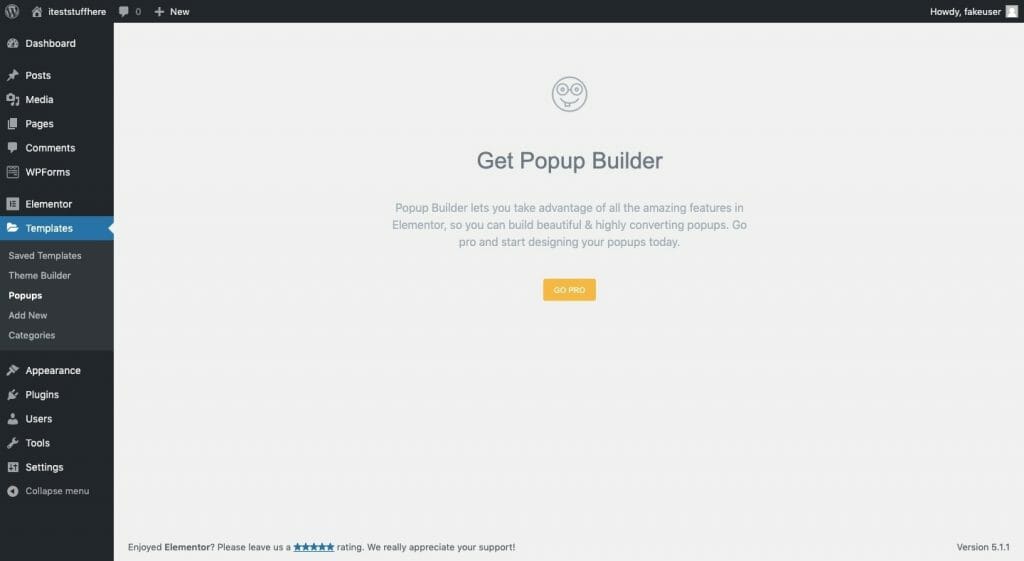
With Pro activated, you can create your popup using Elementor templates.
Go to Templates > Add New and name your competition landing page popup (or whatever lead gen offer you have). Click “Create Template”.
Choose a template from Elementor’s library — Simon prefers using Blocks instead of Popup templates — and then customise the design to your liking. The goal here, though, is to keep it very simple:
- Lead gen headline (i.e. “this is what you need to do to get the lead gen”)
- Form with fields for Name, Email, and maybe a Message
- Personalised submission button
If you feel you need to sell them on the submission, revisit your landing page copy and adjust there.
Click on the form to adjust its settings.
Go to Content > Actions After Submit and change this to “webhook”. (In case you still prefer to get email notifications, use the MailChimp Lead Generation tutorial as your guide.)
This is where you’ll connect Zapier to your popup.
Step 4: Create the Landing Page-Popup Trigger
Inside your popup settings, go to Advanced > Open By Selector. Add a custom class to the field. Simon uses “.prize-button”. Use whatever makes the most sense for you.
Next, open the Edit screen for your lead generation landing page. Click on the button to open its settings.
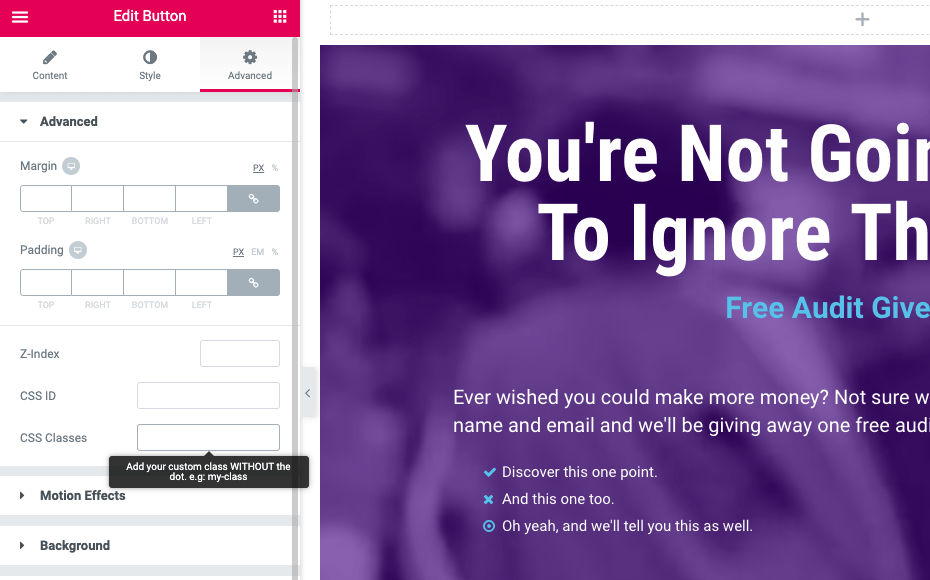
Go to Advanced > CSS Classes and input the same class as you did for the popup, but without the leading (.). So, it would look like this: “prize-button”.
Test out the connection on your landing page preview to make sure the button triggers the popup.
Step 5: Build the Zap
A “zap” is an automation between two platforms. Even if you’re not currently building a lead gen landing page for anyone (including yourself), you can still use this to boost your productivity in other ways.
For the purposes of this example, here is what you need to do to create the landing page-Google Sheets connection.
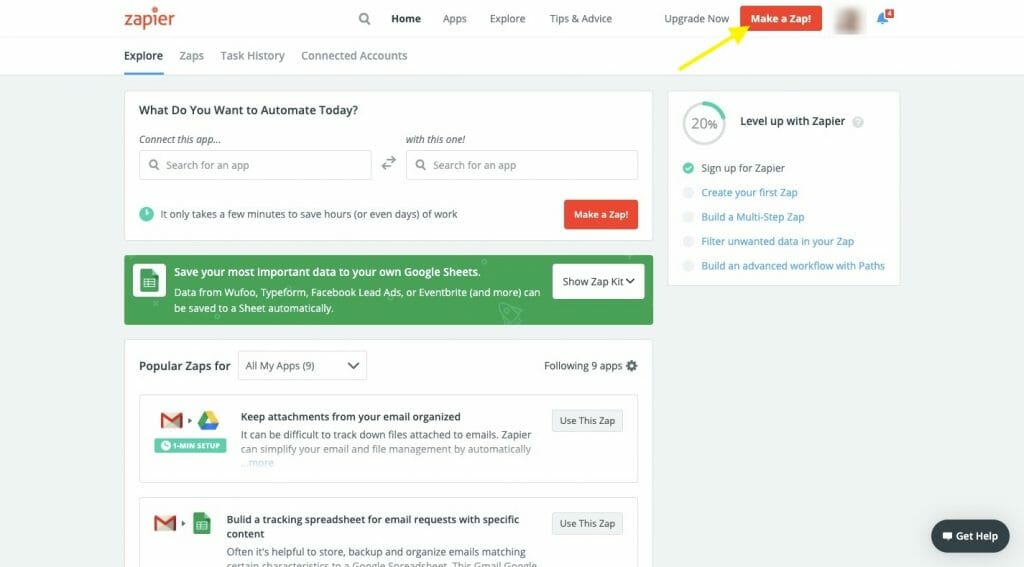
1. Click on Make a Zap!
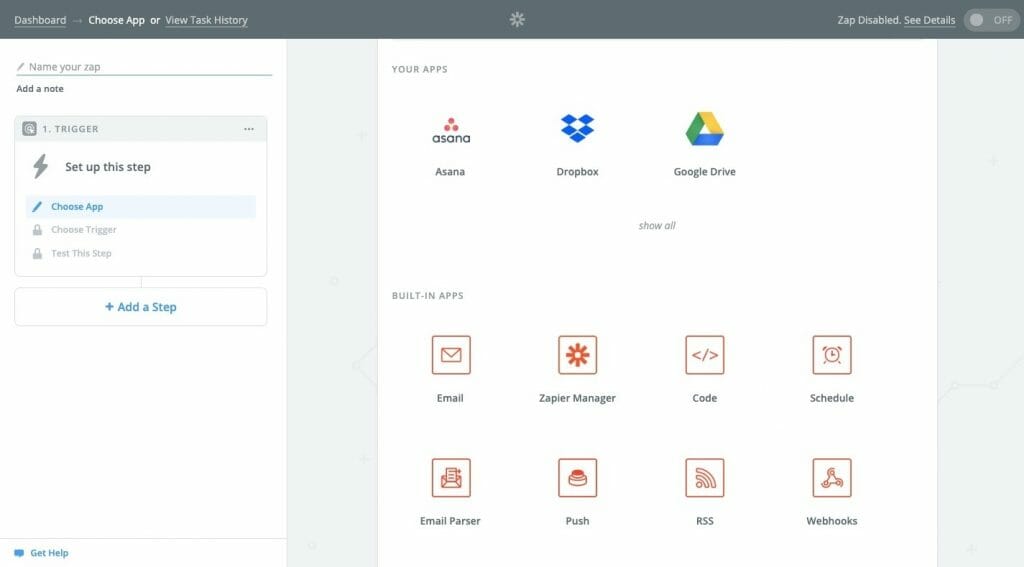
2. When it asks you to Choose a Trigger App, scroll down and select “Webhooks”.
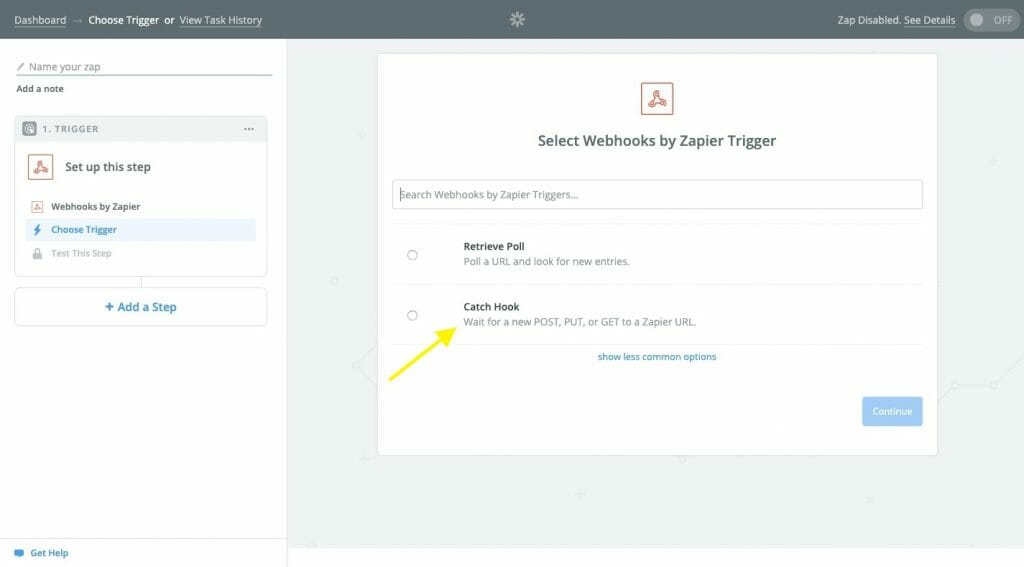
3. Select “Catch Hook” and save your changes.
 4. Copy the webhook URL provided.
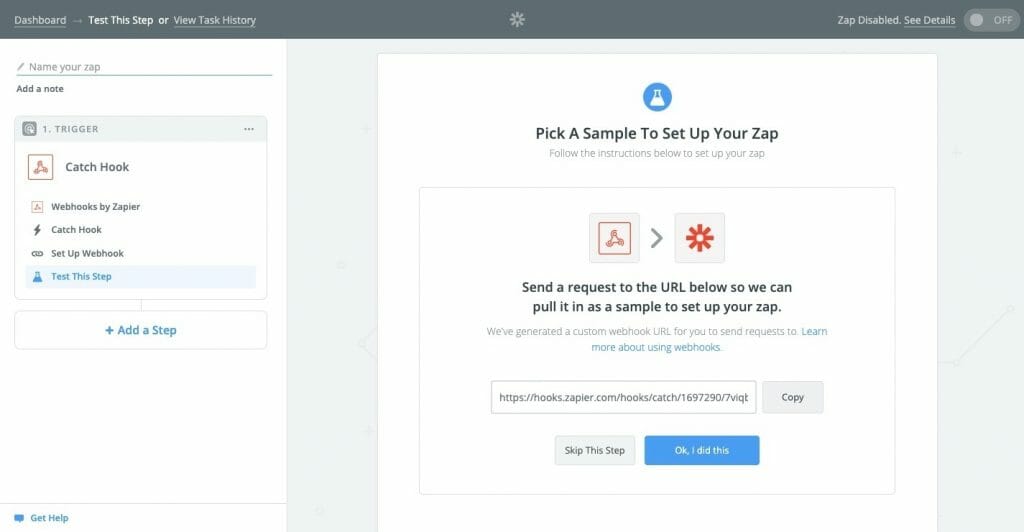
5. Return to WordPress and find the webhook field in your popup’s settings. Paste in the URL and publish the changes to the site. This will send data submitted through the popup to Zapier.
Click on “OK, I did this” and confirm the details of your submission.
6. Zapier will tell you that you’re missing an Action step. Click on the button provided and choose an Action App.
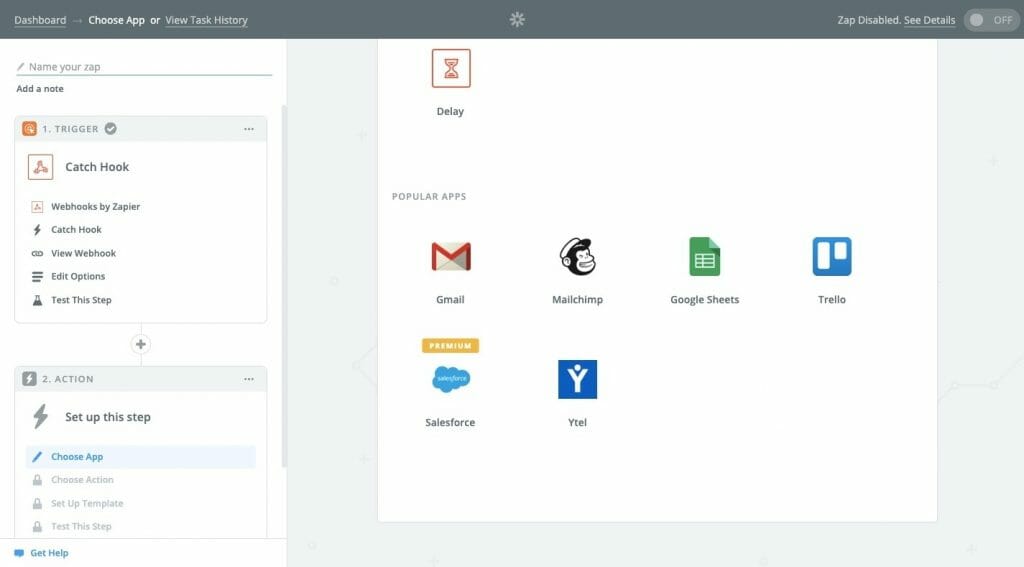
If you want to send results to a Google Sheet, select the corresponding app.
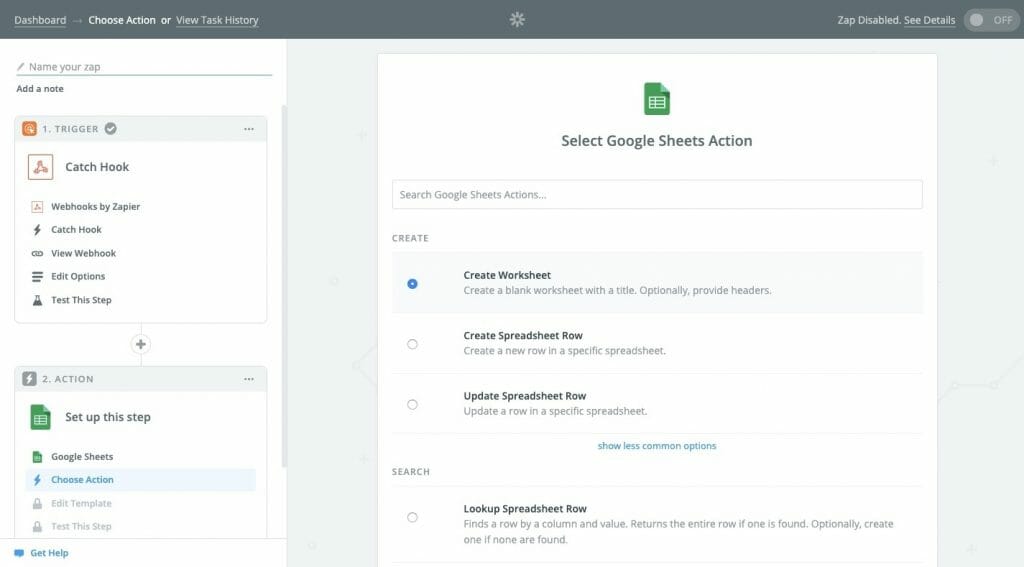
7. If you haven’t created a spreadsheet yet, choose “Create Spreadsheet”. If you have the spreadsheet set up, click “Create Row in Spreadsheet”.
8. If you haven’t authenticated the Google connection to Zapier, you’ll see this screen.
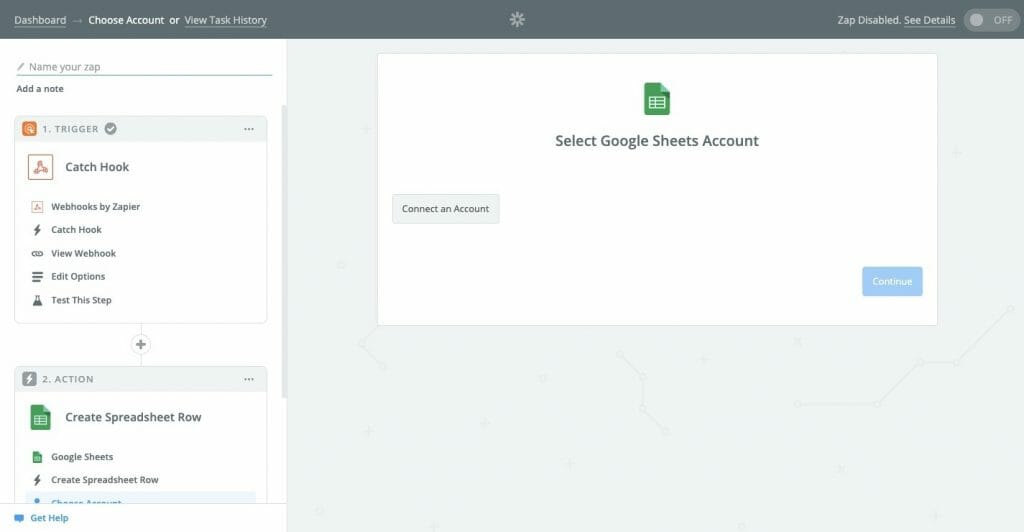
Walk through the steps.
9. Next, select the spreadsheet (document) and worksheet (tab) to flow Zapier data collected from the popup into.
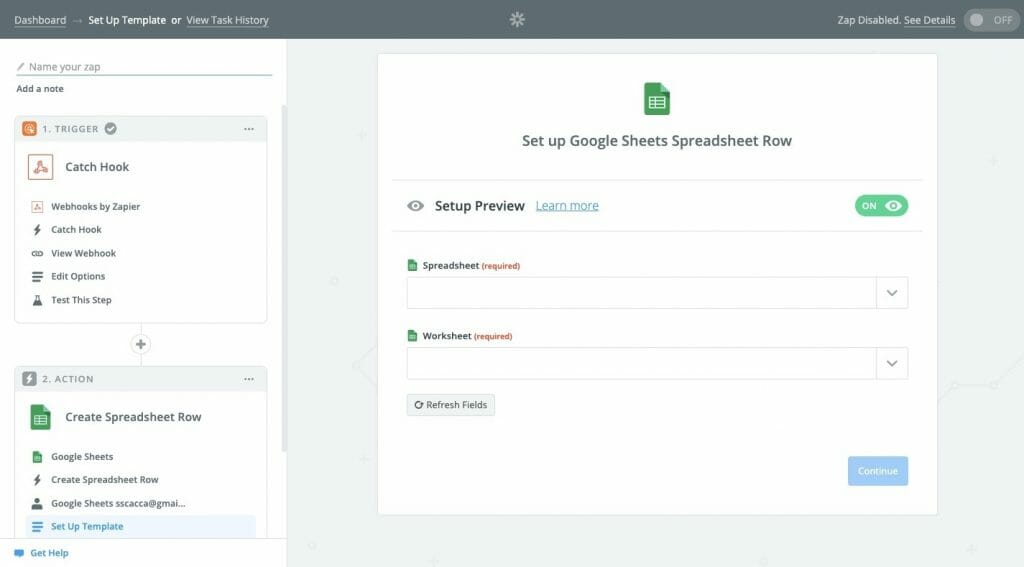
10. Match up the form field names with the fields from your popup form.
Step 6: Test the Elementor > Zapier > Google Sheets Connection
When you’re done with the setup, do a test from your landing page, fill out the popup form, and go to your Google Sheet to verify that the information is there. If it is, you’re golden!
Wrap-Up
I realise this seems like a lot of work, but think about the payoff:
- Automate the collection of form submissions from your WordPress site.
- Works for any type of lead generation — for your clients’ businesses or for your own.
- Enables you to put real-time data into the hands of your clients without having to do anything besides initial setup.
As you look for ways to be more efficient with your time, don’t be afraid to offload that work to trustworthy tools like Elementor, Zapier, and Google Sheets. There’s a lot to be gained from just 15 minutes of setup.
Speaking of saving time… another way to save time is to charge more and find clients who aren't difficult to work with! Don't think it is possible for you? Well check out this free workshop and let us know what you think!


